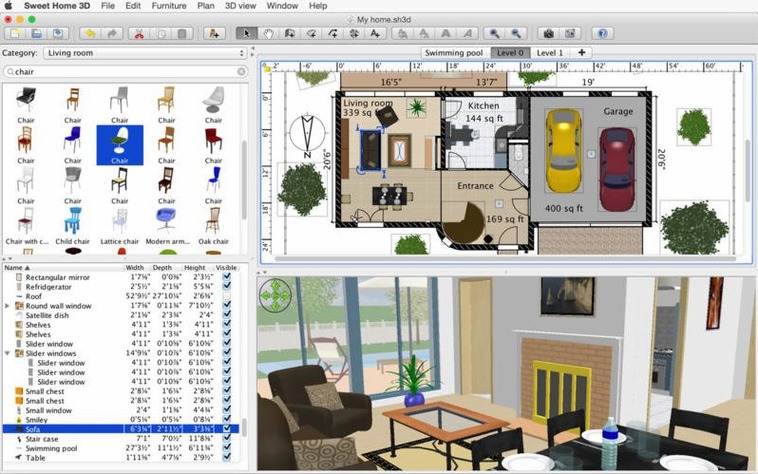
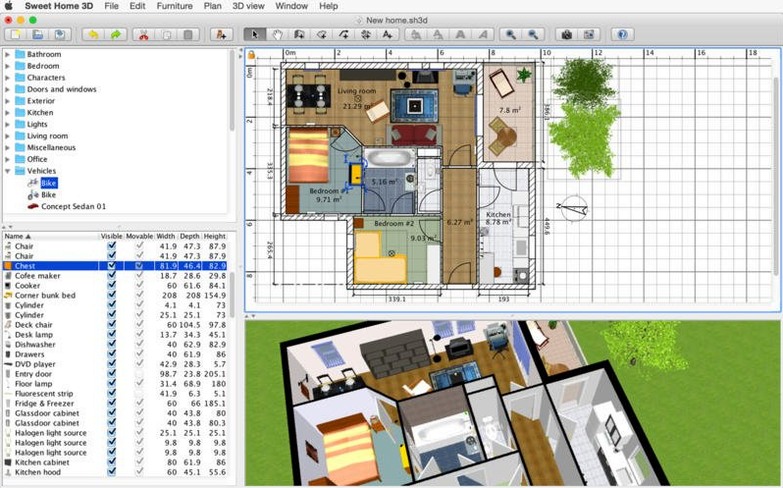
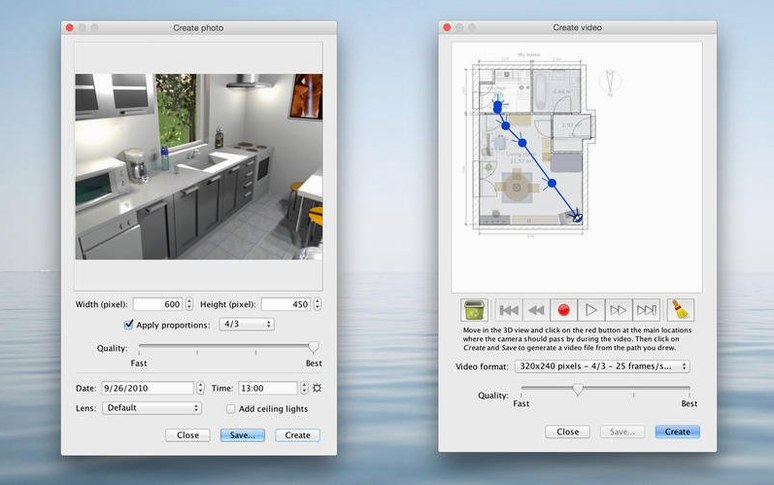
Sweet Home 3D is for anyone planning a renovation, rearranging a room, or sketching a new build who wants to see the result in three dimensions without learning CAD. It turns a flat floor plan into a textured, navigable 3D scene.
| What it handles | Export formats |
|---|---|
| Wall, floor & ceiling colours/textures | PDF, PNG, JPEG |
| Furniture size, orientation, height, colour | SVG, OBJ |
| Imported 3D models | Print plan + 3D view |
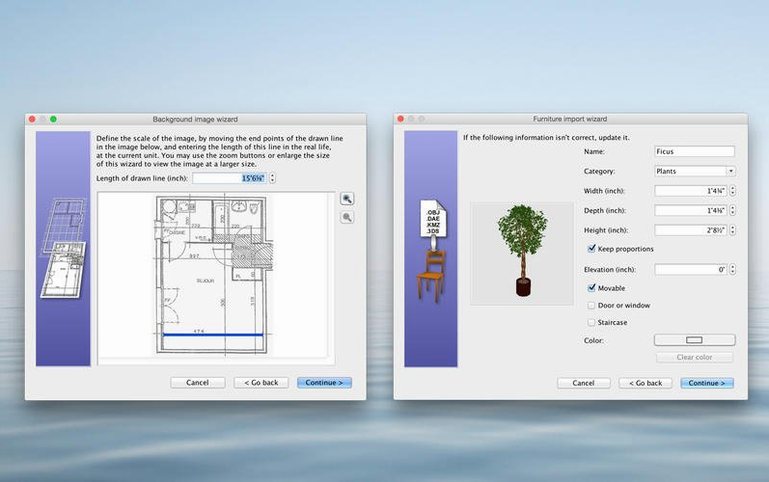
Take a single room layout as a realistic task. You draw the four walls on the 2D grid, snap a door into the opening, and drag a window from the built-in catalogue. Switch to the 3D pane and the room appears with light and shadow. You change the floor to matte oak, paint the walls a flat grey, then pull in a sofa, a low table, and two bookshelves—resizing each piece by grabbing its corners and rotating it until the circulation feels right. If the standard catalogue lacks the exact pendant light you want, you import a free OBJ model, adjust its height and colour, and drop it centre ceiling. The plan exports as a dimensioned PDF for the contractor; the 3D view renders to a PNG you send the client. That covers the whole job, from blank grid to printed plan and rendered shot.
First days: build a habit that saves rework
Create a template file on day one. Drop your typical wall thicknesses, ceiling height and a few go-to furniture pieces onto a blank plan, then save it as Template.sh3d. Every new project starts from a consistent base instead of a blank grid.
- Name levels early. The moment you add a basement or first floor, open the level list and give each one a clear label—"Ground floor," "Upper floor," "Basement." Untitled levels multiply fast and become a puzzle later.
- Lock the base plan. Once walls and major openings are confirmed, duplicate the level, lock the original, and design furniture layouts on the copy. You can always compare against the locked version.
- Set your sun position once. In the 3D view options, pick a geographic orientation and time of day that matches how light actually hits the site. Photorealistic renders look wrong when the sun is pouring through a north-facing wall at 6 PM.
- Tag imported models. When you bring in an OBJ from an external library, rename it in the furniture list immediately—"Vintage pendant 40 cm brass"—so the catalogue doesn't fill with untraceable filenames.
From Paper Sketch to Mac-Ready Floor Plan
Sweet Home 3D is strongest as the middle step between rough sketches and construction documents. It doesn't replace a dedicated CAD application for permit drawings, but it plugs neatly into a workflow with other Mac tools.
Sketch dimensions on paper or in Freeform, then transfer them into Sweet Home 3D for the spatial layout. Once the plan works, export the 2D view as SVG and refine line weights and annotation in a vector editor. The rendered 3D images drop straight into a presentation deck in Keynote or a mood board in a graphics app. For walkthroughs, record a screen capture of the virtual visit and trim it in QuickTime Player—no separate video editor required.
macOS colour picker integration means any paint or material colour you sample in another app can be applied to walls and furniture inside Sweet Home 3D with the eyedropper. The app also respects the system-level print dialogue, so you can send dimensioned plans directly to a PDF service or a large-format printer without intermediate steps.
- Fixed — Synchronization issues that appeared when the 3D view ran in a separate window.
- Fixed — Rendering of underground levels that shared the same elevation.
- Fixed — Font display errors in the Thai interface.
- OS X 10.9 or later
- Apple Silicon, Intel 64-bit
Comments 0
Sign in to leave a comment.Sign inCreate an account
No comments yet. If a step is still there after you install it, say so.
More in CAD & 3D
All in CAD & 3D Updated
SketchUp Pro
Blocks out building volumes and adds detail with solid modelling tools.
23 steps saved
 TouchDesigner
Replaces text-based coding with a network of operators for real-time media.
5 steps saved
 Vectorworks
Connects 2D drawing and 3D modelling for architecture, landscape and entertainment design.
19 steps saved
 Rhino
Creates mathematically precise curves and surfaces, not polygon approximations.
17 steps saved
 Updated
Plasticity
Shapes solids directly without a parametric history tree holding you back.
6 steps saved
 Pixologic Zbrush
Sculpts high-resolution characters and organic forms like digital clay.
17 steps saved
 Maya
Keeps keyframing, cloth, rigging, and rendering inside a single application.
6 steps saved
 MAXON Cinema
Handles product rendering, character rigging, and walkthroughs in one package.