
It runs on macOS 10.14 through the current release, on both Intel and Apple Silicon Macs.
Cutting — trimming clips, splitting scenes, removing unwanted sections from a timeline.
Rotating — flipping a vertical phone clip into landscape, or straightening a slightly crooked horizon.
Text overlay — adding titles, lower-thirds, and subtitles so a video communicates clearly even with the sound off.
Project saving — closing a half-finished edit and reopening it later with all assets and cuts intact.
Direct export — sending a finished file to Vimeo, YouTube, and similar services without leaving the workspace.
How Filmora Behaves Under Real Workloads
Speed depends largely on the footage you throw at it. With 1080p H.264 clips from a DSLR, timeline scrubbing stays smooth even with three or four tracks stacked. Proxy generation isn't forced on you at import — the app waits until playback stutters, then offers to create lightweight copies. On an Apple Silicon Mac, that threshold rarely arrives before you've added colour grades, transitions, and a few title layers.
4K HEVC from an iPhone pushes things harder. The first minute of editing feels fine, but once you layer LUTs and a couple of Fusion-style overlays, you'll notice a half-second lag between dragging a clip and seeing it snap into place. Enabling proxy files fixes that entirely. On Intel machines with 8 GB of RAM, proxy mode is less of a suggestion and more of a necessity for anything above 1080p.
Memory use sits around 1.2–1.8 GB at rest with an empty project. A 10-minute timeline with mixed 4K and 1080p clips, a few titles, and background music pushes that to roughly 3.5 GB. That's lighter than some NLEs that pre-render everything in RAM, but heavier than Apple's own iMovie. The trade-off is that Filmora keeps more effects live for real-time preview — you see the glow or the film grain before you commit to rendering.
Stability-wise, version 14.8 handles long sessions without complaint. Leaving the app open overnight with a project loaded doesn't trigger memory leaks that were common in the 12.x line. Crash-on-export, a frustration in earlier builds when mixing variable-frame-rate phone footage with constant-frame-rate camera clips, hasn't surfaced in this release. QuickTime screen recordings from a Mac still import cleanly, and the variable frame rate warning that used to block them is now dismissible with a single click.
Where Filmora Sits Among Other Tools
Filmora doesn't try to replace a full NLE. It fits beside one. The typical pattern: rough assembly happens here, finishing work moves elsewhere — or the reverse, depending on the project.
With Final Cut Pro, the relationship is straightforward. Export an XML from Filmora and you'll be disappointed — it doesn't do that. But export a ProRes 422 master, and Final Cut reads it as clean source material for colour grading or audio sweetening. The reverse path works too: cut a draft in Final Cut, export a single flattened clip, then pull it into Filmora for quick text animations and one-click social-media cropping.
With DaVinci Resolve, the handoff is colour-first. Filmora's built-in LUT support and basic curves handle quick grading, but when a project needs node-based secondaries or qualifier keys, you export a clean log-format file and finish in Resolve. No round-tripping, no project interchange — just a render and an import. It's blunt, but it avoids the metadata headaches that come with more ambitious workflows.
With ScreenFlow or Camtasia, Filmora replaces the editing half. Those apps capture well; Filmora edits captured footage more flexibly. A common pairing: record in Camtasia, export the raw capture, and build the final cut in Filmora where the title templates and transition variety are stronger.
macOS integration is mostly solid. The media browser sees your Photos library and Music playlists without extra steps. iCloud Drive folders appear in the import panel, so footage synced from an iPhone shows up automatically. Drag-and-drop from the Finder works for video, audio, and image files. The one gap: no Quick Look preview in the import dialogue — you pick files by name alone, which gets tedious when your camera names everything DSCF0042.
Spotlight indexing won't find Filmora projects. If you lose a .wfp file in a folder hierarchy, you're hunting manually. That's worth knowing before you scatter projects across four external drives.
AirDrop a clip to your Mac while Filmora is open, and it appears in the Downloads folder but not inside the app's media bin. You'll need to drag it in or use the import button. A minor friction, but one that breaks the flow when you're grabbing quick phone shots mid-edit.
Live With the Default Layout Before You Customize Panels
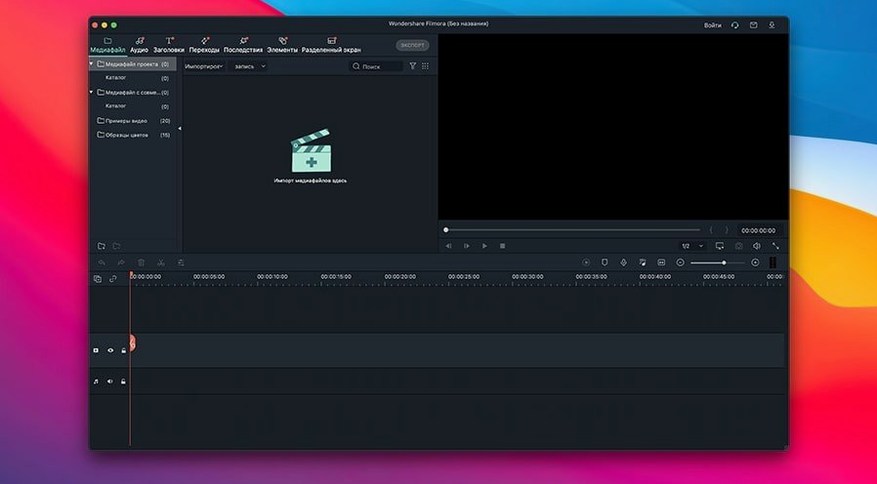
The default layout puts the media bin top-left, preview top-right, and timeline across the bottom. It works. Don't rearrange it on day one — live with it long enough to learn where every tool hides before you start customizing panels.
Set your project defaults early. Before importing a single clip, visit the project settings and match the frame rate and resolution to your primary footage. Filmora guesses based on the first clip you import, but that guess is wrong often enough to waste time. If you shoot 24 fps, lock it at 24. The app won't retrofit settings later without a new project.
Build a small export preset. The export window offers a long list of formats. Find the two or three you actually use — H.264 for review uploads, ProRes for master files — and star them. On day three, when you're exporting the fifth version of a client draft, you won't scroll through WMV and 3GP entries you've never touched.
Learn the ripple delete shortcut. Cutting a section and leaving a gap is the default; ripping it out so everything to the right slides left is a single key combination (Shift-Delete). Master that on the first afternoon. It's the difference between editing that feels like carpentry and editing that feels like typing.
Organize the media bin with folders. After two projects, your bin becomes a flat list of unlabelled clips. Create folders for A-roll, B-roll, audio, and graphics before importing. The bin doesn't force this structure — you enforce it. Future you, hunting for the one reaction shot among forty clips, will notice the difference.
Test export settings on a 30-second sample. Before rendering a 20-minute timeline, select a short range and export just that. Check the bitrate, the colour shift, the audio sync. Fixing a gamma crush on a 30-second test takes seconds. Re-exporting a full project because the H.265 preset crushed the shadows takes an hour.
AI Denoise Now Processes 30-Second Clips Faster
Version 14.8.10 arrived with two targeted improvements. AI Denoise received an under-the-hood rework — the effect still removes grain and low-light noise, but the processing time dropped noticeably. A 30-second clip that used to take 45 seconds to analyse now completes in roughly 30 seconds on an M2 Mac. The result looks cleaner in shadow areas too, with fewer of the waxy smearing artifacts that plagued the first iteration of the feature.
The same update tightened NewBlueFX integration. Third-party NewBlue effects — titling, transitions, and filters — load faster when you drag them onto a clip, and the preview no longer stutters while the plug-in initializes. If you own the NewBlue packs, the difference is immediate; if you don't, the change is invisible.
Version 14.8.17 is a maintenance release. No new features were documented, and no behavioural changes were called out in the release notes. The build number suggests bug fixes and compatibility adjustments — the kind of update that keeps the app running on the latest macOS builds without fanfare. Stability under macOS Sequoia, which some video editors approached cautiously, appears to be the unspoken focus. In daily
The interface speaks Russian, English, German, French, Japanese, and ten other languages.
- macOS 10.14 or later
- Intel or Apple Silicon Mac
Questions I get before install
Can I reopen a saved project in Filmora?
Yes, you can save a project at any stage and reopen it later to continue editing without losing your timeline work.
Comments 0
Sign in to leave a comment.Sign inCreate an account
No comments yet. If a step is still there after you install it, say so.
More in Mac Apps
All in Mac Apps Wondershare Recoverit
Recovers files from drives that no longer mount in macOS, including lost partitions.
4 steps saved
 Updated
Wirecast Pro
Replaces a hardware switcher with a software control room for live video production.
5 steps saved
 Wipr
Strips ads, trackers, and cookie popups from Safari pages before they download.
19 steps saved
 WinZip Mac Pro
Shrinks files, locks them with encryption, and gets them where they need to go.
4 steps saved
 Updated
Wins
Arranges and snaps application windows into layouts without dragging edges pixel by pixel.
10 steps saved
 Winclone Pro
Backs up only the blocks that changed in your Windows partition for faster, smaller snapshots.
5 steps saved
 WidgetWall
Adds a collection of functional widgets and stickers right onto your desktop.
6 steps saved
 Updated
WhatCable Pro
Decodes a USB-C cable's hidden speed and power ratings from its e-marker chip.