
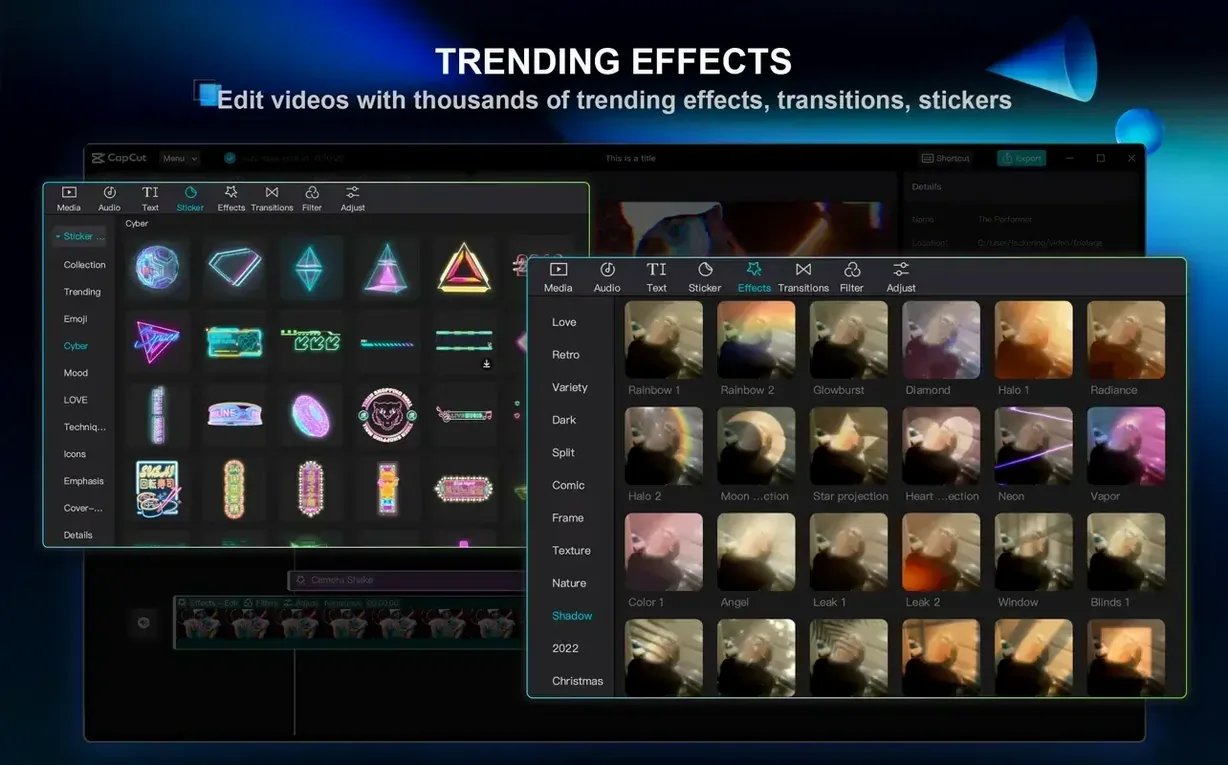
A podcast recording lands on your timeline. The guest track has a dozen ums and a long, dead pause before the main point. You need it clean in under two minutes.
- Silence the filler. Use the script-based transcription tools to identify and strip filler words and unwanted pauses across the whole clip with one action. It works on the text, not the waveform.
- Build a composite. Drag your speaker over a branded background. Apply a one-click background removal, then fine-tune the edge. For a green-screen clip, switch to the chroma key tool and pick the colour to drop out.
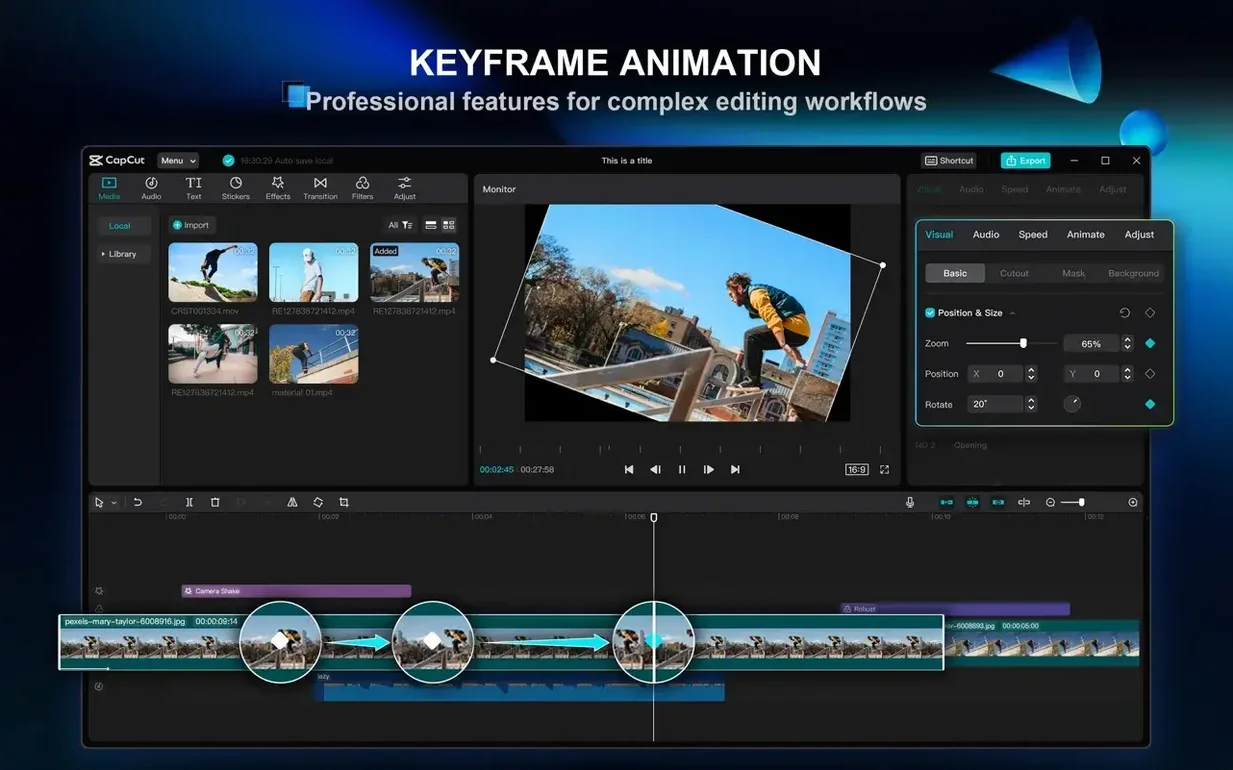
- Animate the overlay. Set keyframes for position and scale on your logo bug. Move it smoothly from corner to centre over three seconds. The timeline shows every control point.
- Design the voice-over. Highlight a sentence of text, pick a voice from the text-to-speech library, and generate a synthetic read. Adjust the speed and pitch to match your edit.
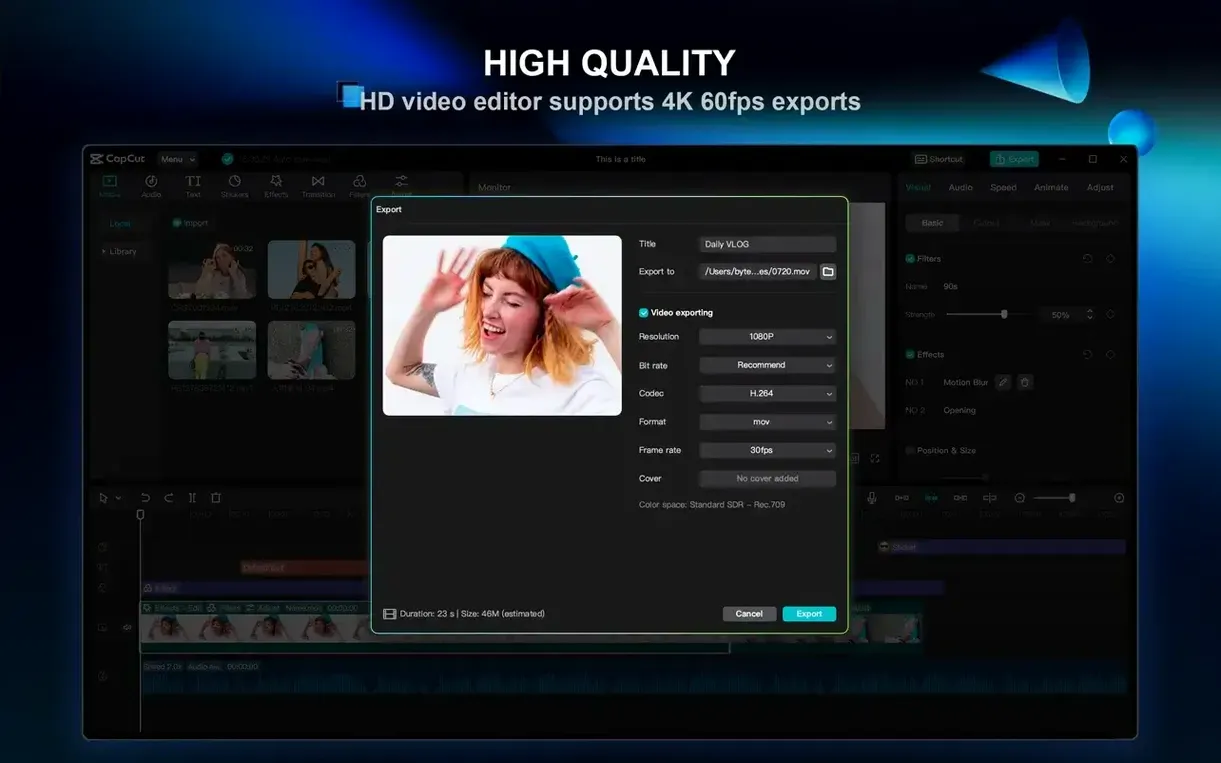
- Export the master. Set the output to 4K resolution at 60 frames per second. Write the file to disk.
Short-form editor’s morning
A freelance short-form editor opens the morning with three client briefs. One needs a 30-second product teaser, another a real-estate walkthrough, the third a podcast highlight reel. Each file lands as raw 4K footage shot on different phones.
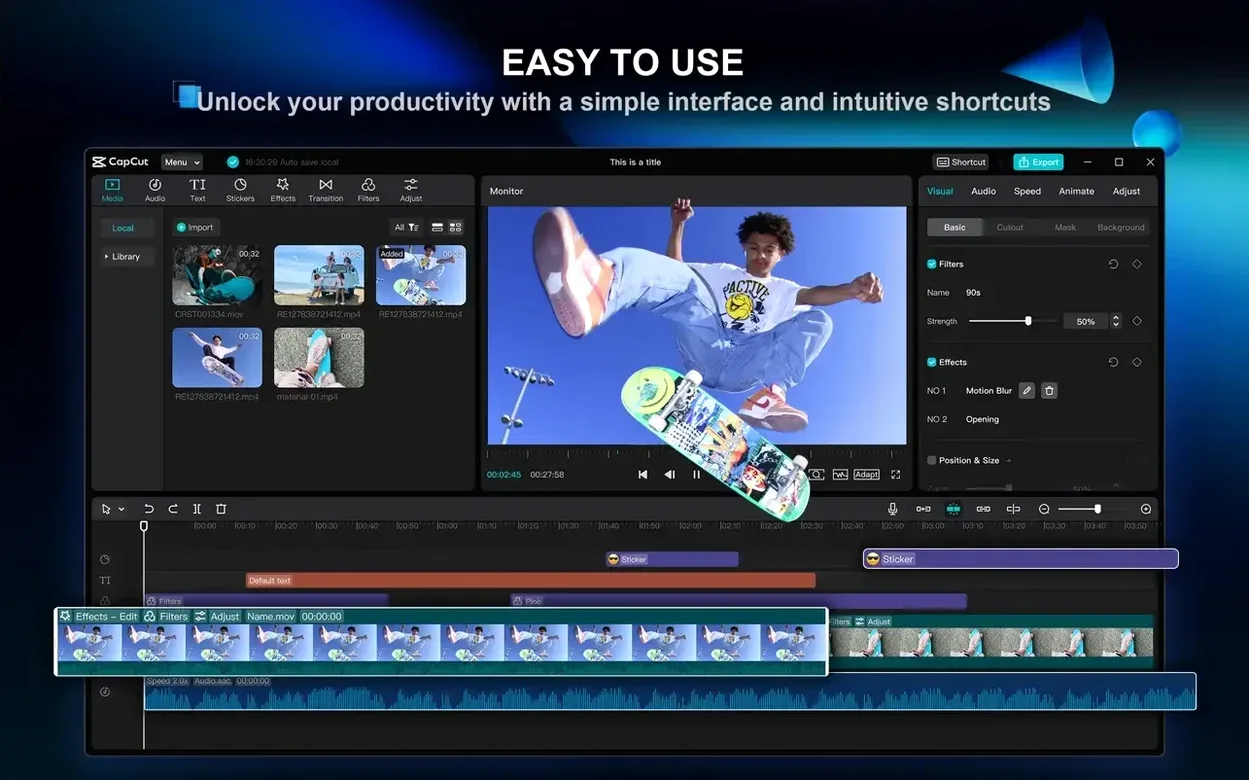
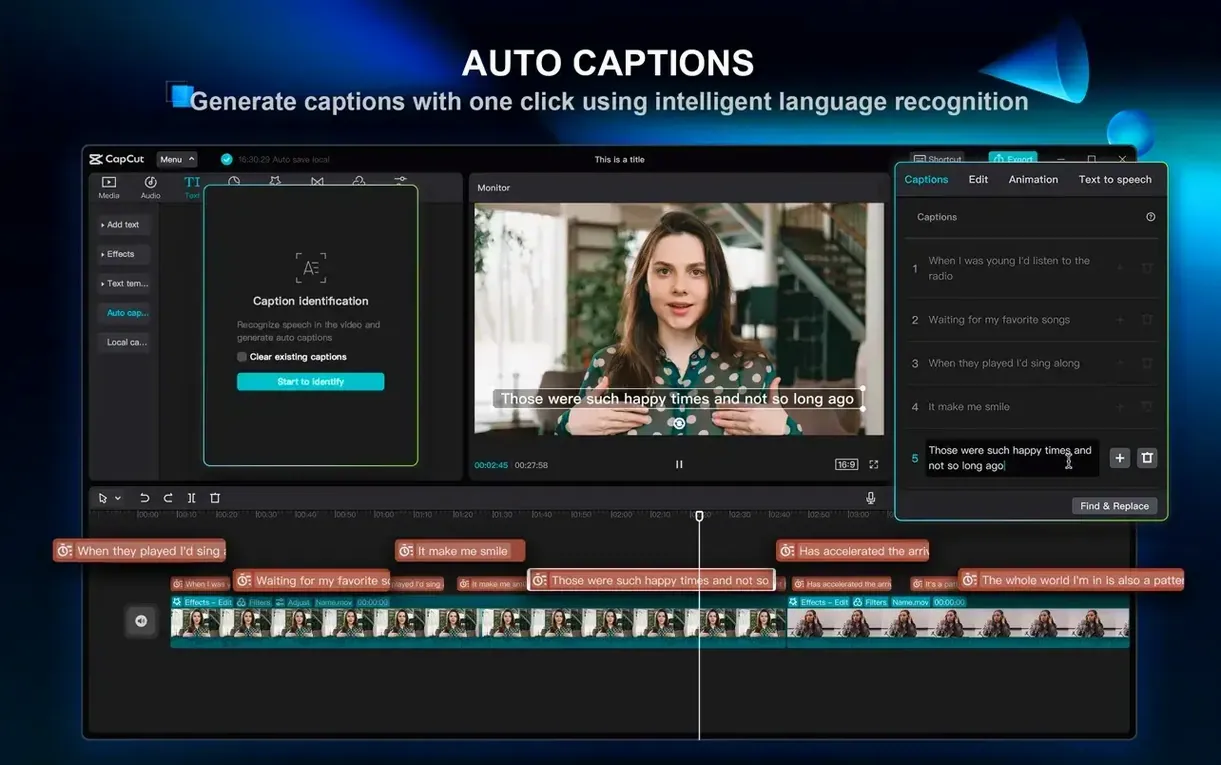
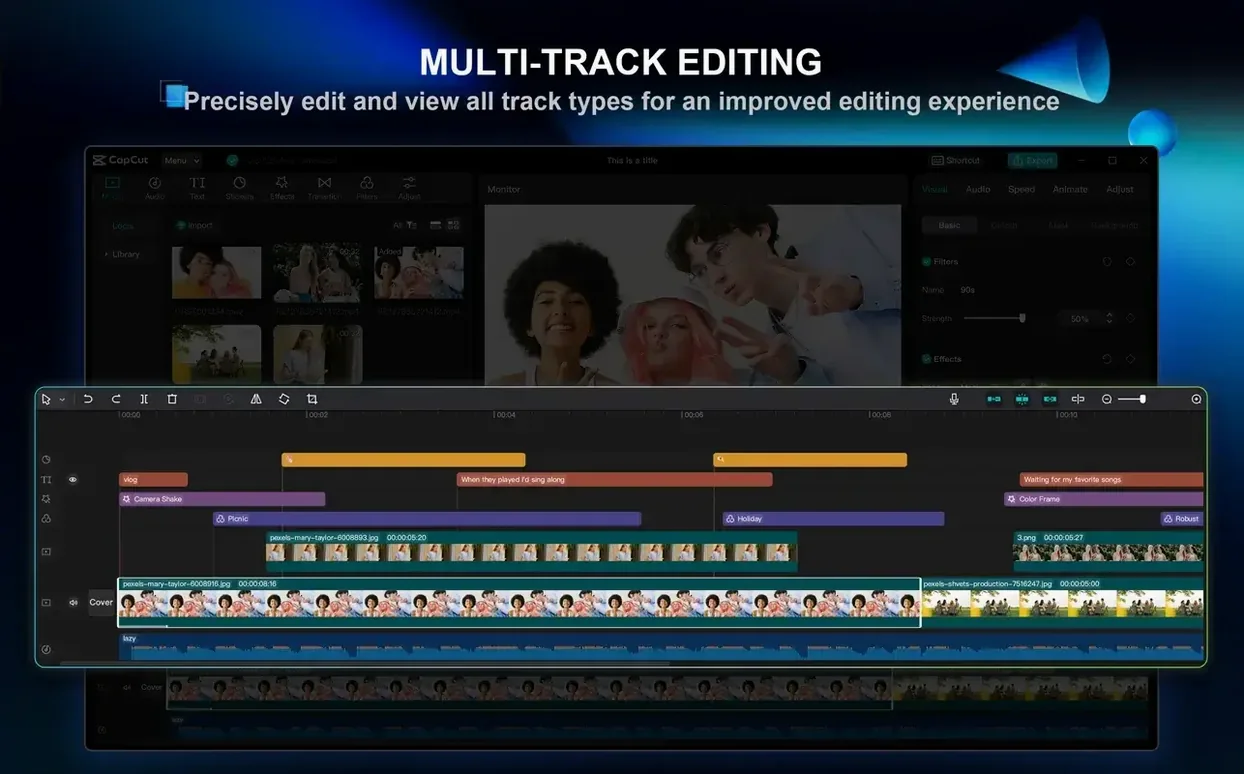
She drags all three projects into CapCut, sets the aspect ratio to 9:16 for the teaser, then splits and trims the product shots to six rapid cuts. Auto-captions generate on playback — English detection catches every word. She adjusts two mistimed captions by dragging their blocks on the timeline, then applies a preset text style from the library. Export at 1080p, 60 fps. First deliverable done in eleven minutes.
Taming green spill halos on fine hair
- Chroma key spill on fine hair. The default colour picker grabs the green but leaves a halo. Fix: open the chroma key controls, reduce intensity by 15%, and nudge the edge feather slider right. For stubborn edges, add a second key layer targeting the remaining tint.
- Keyframe drift on resized clips. Scaling a clip after keyframing position can shift the animation. Workaround: set keyframes last, after all transforms are locked. If drift occurs, reset the clip’s scale, reapply keyframes, then adjust size in the final pass.
- Audio sync after filler removal. Stripping filler words shortens the track, so background music drifts. Group the cleaned voice track with the music bed before the removal step, or ripple-delete the gaps and slide the music to match the new cut points.
- 4K export stutter on older Macs. Intel Macs with 4 GB RAM can choke on 4K 60 fps exports. Drop the preview quality to half during editing, close background apps, and export to H.264 instead of HEVC. The timeline stays responsive.
Script-to-video workflow for a product demo
A marketer has a written script for a 90-second software demo. No footage yet. Here is the path from text to finished video.
- Paste the script. Open the script-to-video tool and drop in the full text. CapCut parses each paragraph into scene cards, then searches its stock library for matching clips. Accept or swap each suggestion; reject three that feel generic and replace them with screen recordings dragged from the desktop.
- Record the voice track. Use the built-in voice recorder to read the script in sections. Each take lands on a separate track. Trim the gaps between sentences and apply a subtle noise reduction preset.
- Sync visuals to speech. Play through the timeline and split stock clips where the narration shifts topic. Extend a screen-recording segment to cover a long feature explanation. Snap cuts to waveform peaks for tight pacing.
- Add text overlays. Generate auto-captions from the voice track. Convert three key phrases to title cards with a bold animation preset. Position each card at the point where the feature name is spoken.
- Colour-grade uniformly. Apply a single LUT across all stock clips to unify the look. Pull midtones slightly warm. Keep screen recordings ungraded so UI elements stay accurate.
- Export for review. Output at 1080p, 30 fps with a burnt-in timecode window for client feedback. Write directly to a shared folder.
The whole edit stays inside one app. No round-tripping between a transcriber, a compositor, and a colour tool. The script-to-video engine handles the rough assembly; manual adjustments lock the timing.
This sequence skips the templates and stickers. It uses the tools an experienced editor reaches for first: fine keyframe control, spoken-word cleanup, and full-resolution export.
- macOS 10.14 or later
- Apple Silicon and Intel 64-bit Macs
Questions I get before install
What macOS version does CapCut require?
The official Mac download page states CapCut is designed for macOS 10.15 and later, though it can run on macOS 10.14.
Does CapCut support chroma key and keyframe animation?
Yes, it includes chroma key for colour-based background removal and supports keyframe animation for precise control over effects, text, and overlays.
Comments 0
Sign in to leave a comment.Sign inCreate an account
No comments yet. If a step is still there after you install it, say so.
More in Mac Apps
All in Mac Apps Canopy
Shows playback controls and a countdown timer in a small overlay at the top of the screen.
17 steps saved
 Updated
Capture One
Gives tethered shooters direct raw-file control over colour and detail before retouching.
19 steps saved
 Updated
Camtasia
Records a screen and provides a timeline editor to trim, annotate, and narrate the result.
12 steps saved
 Carbon Copy Cloner
Creates a direct, bootable duplicate of a disk on a schedule you set.
4 steps saved
 Camo Studio
Turns a phone or tablet camera into a high-quality webcam with overlay controls.
22 steps saved
 Updated
Caffeinated
Keeps your Mac awake, display bright, and screensaver off from the menu bar.
20 steps saved
 BuhoLaunchpad
Replaces the standard app grid with a snappier, folder-friendly launcher.
6 steps saved
 BuhoCleaner
Removes leftover files from uninstalled apps and clears system clutter.