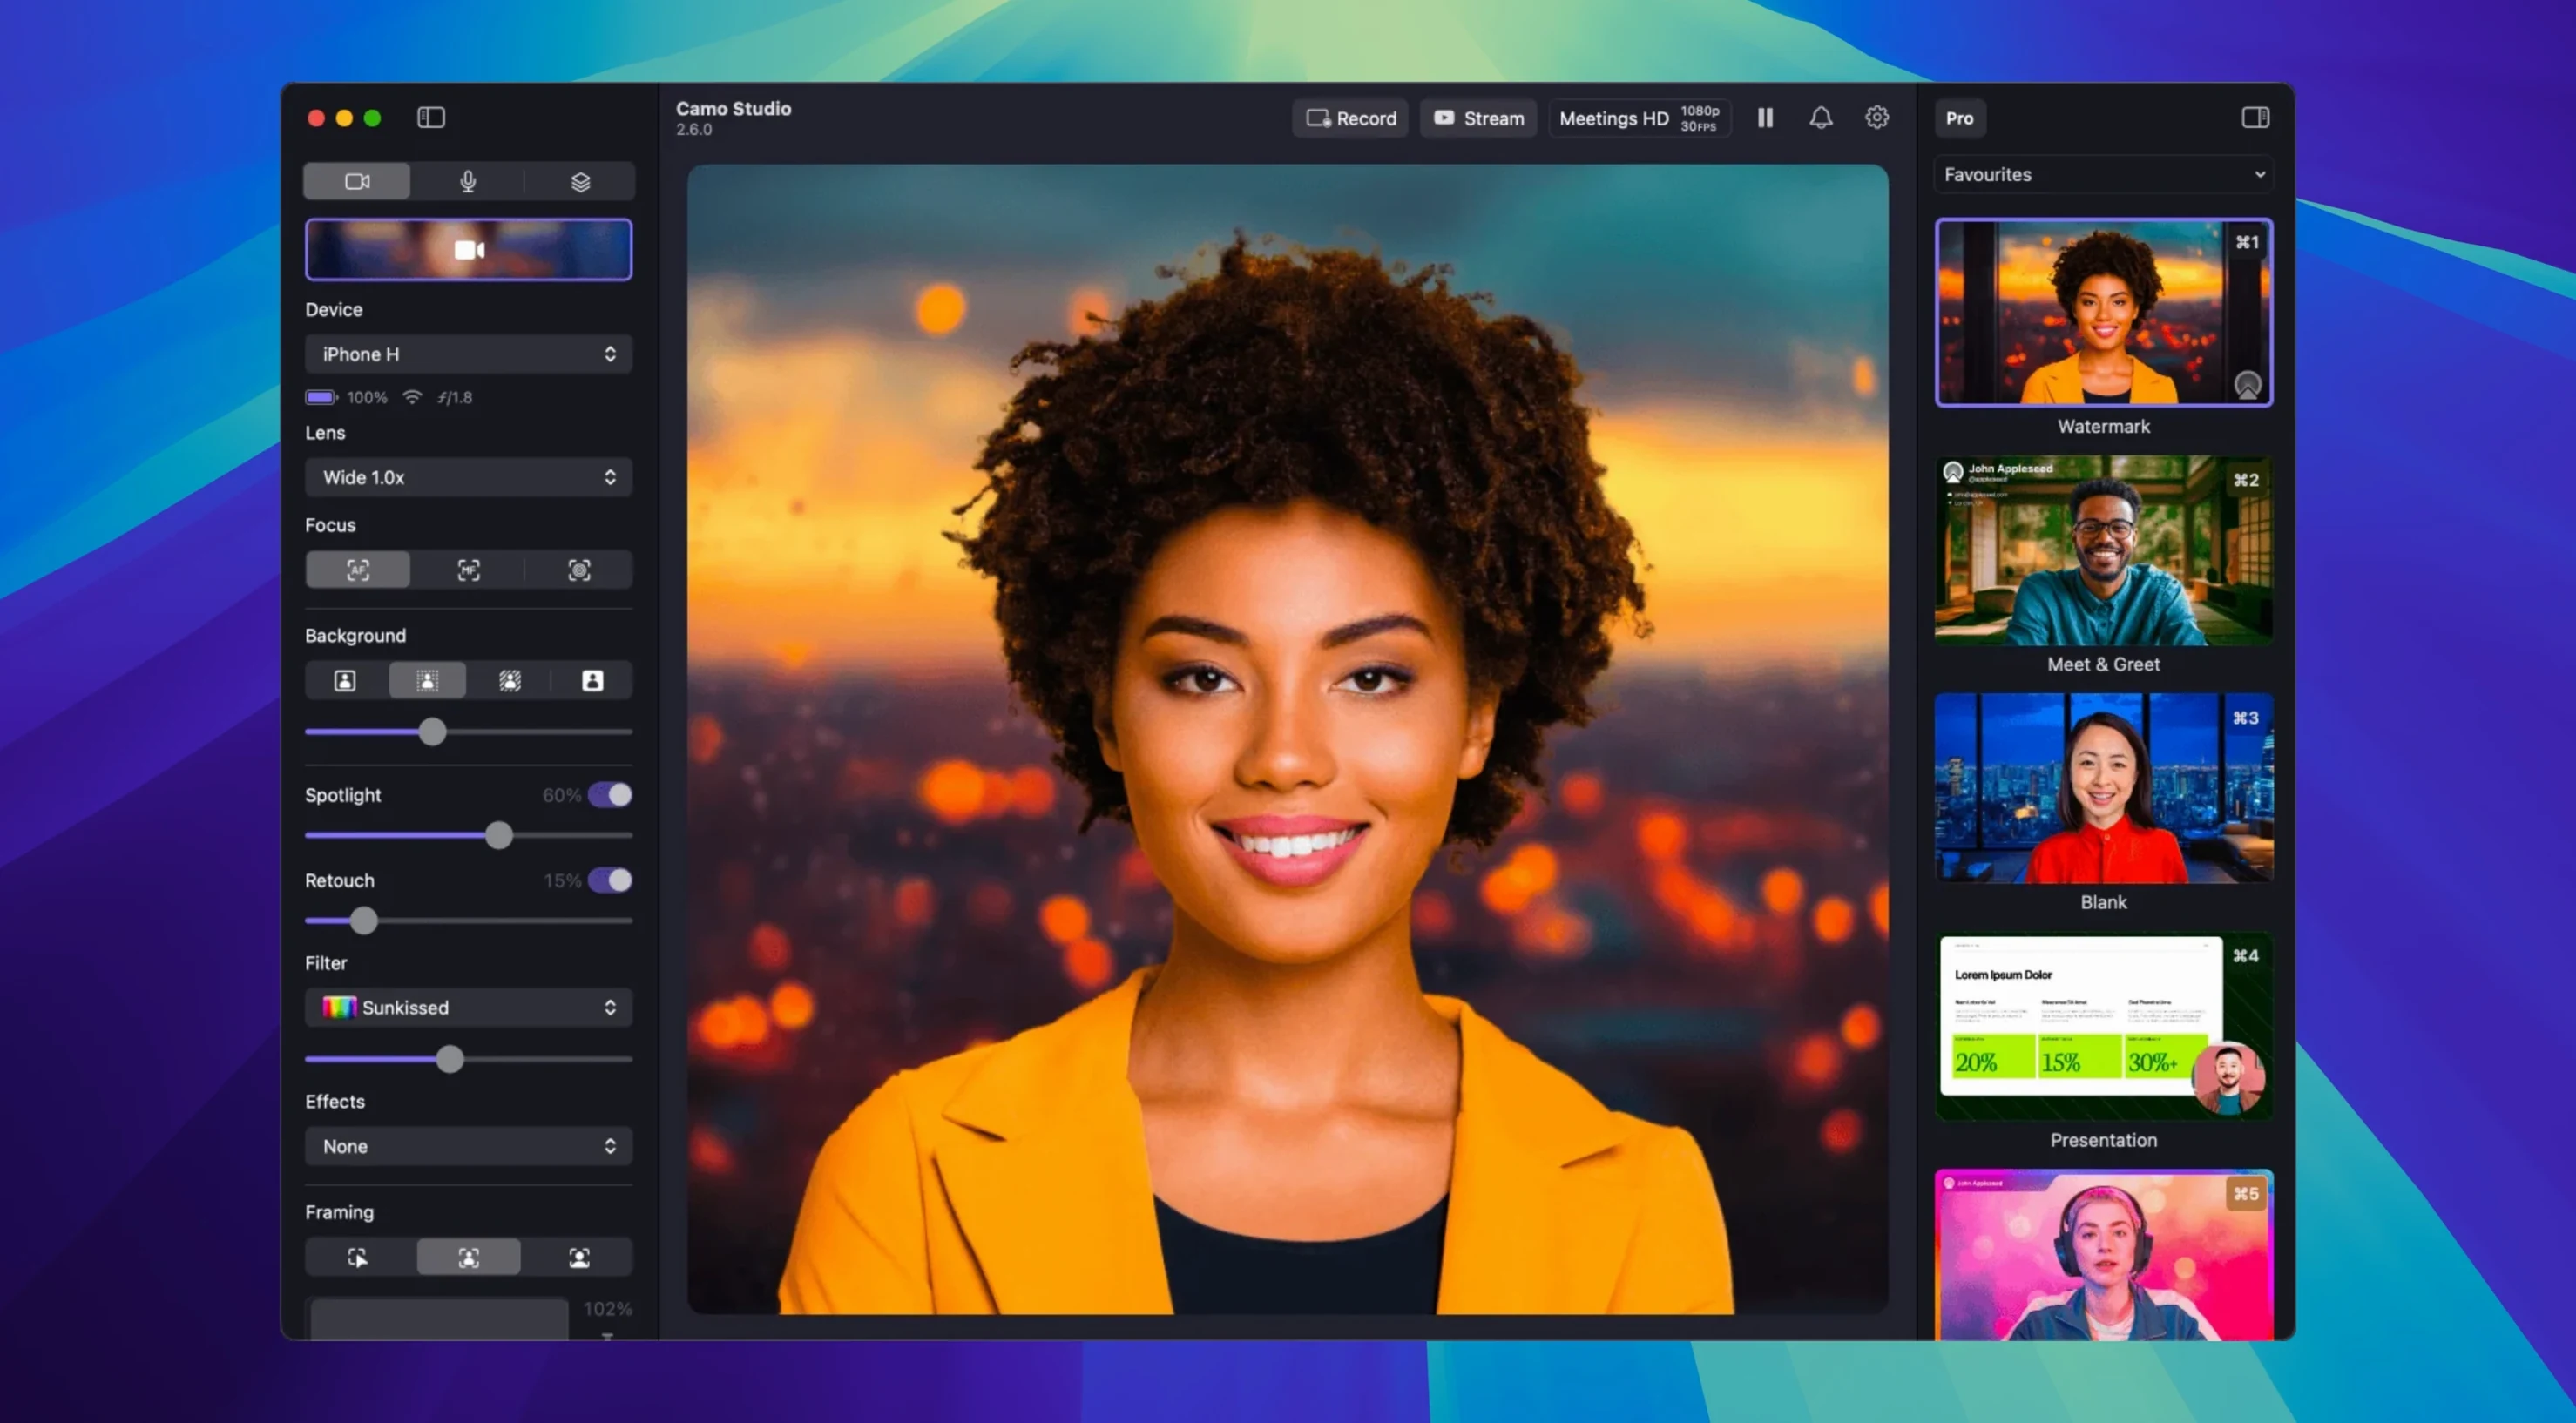
Presenters who live on video calls, streamers managing multi-layer scenes, and hybrid workers tired of grainy laptop cameras reach for Camo Studio. It gives macOS and Windows machines direct access to the rear camera system of an iPhone, Android phone, or tablet.
Using your phone as a better webcam and virtual background
- Can it replace a dedicated webcam? Yes. A connected phone delivers higher resolution and better low-light performance than most built-in or USB cameras.
- Does it handle backgrounds? A virtual green-screen replaces the room behind you without a physical backdrop.
- What about image quality? AI face retouching, digital stabilization, and 18 built-in LUT filters ship with the app. It also loads custom LUT files.
- Can I build scenes? Overlays, text, logos, and web overlays sit on separate layers. Version 2.9.0 adds isolated recordings for individual sources on macOS.
- Is this a video-call-only tool? No. A dedicated Video Call mode improves lighting for meetings, but the app also records and streams with dual-format output.
Camo Studio 2.9.0 on macOS
The latest release layers in audio noise reduction, dual-format streaming and recording, and AI agent control. Isolated recordings let you capture a clean feed per source, which fixes messy edit timelines later.
A meeting-ready look in under two minutes
Open Camo Studio, plug in your phone, and grant the connection prompt. The app detects the device and applies the last-used settings automatically.
- Select Video Call mode from the adjustment panel. It lifts shadows and evens out skin tones without touching manual sliders.
- Enable Portrait mode for a soft bokeh behind you. Slide the aperture control to taste.
- Activate auto framing. The crop follows your face if you lean forward or shift sideways.
- Pick a background: blurred, replaced with a still image, or solid colour from the virtual green-screen library.
- Launch your meeting app. Camo Studio appears as a camera source — select it once and every call uses it thereafter.
For a stream with overlays, add a scene. Drop a logo layer top-left, a web overlay with chat, and your camera layer beneath. Hit record. Isolated recordings (new in 2.9.0) save each layer as a separate file, so you can tweak the overlay positions in post without re-rendering.
Setting resolution per scene and enabling audio noise reduction
- Default resolution and frame rate. Set these per scene under the device tab. 1080p at 30 FPS covers most calls; switch to 4K at 60 FPS for recorded product demos where detail matters.
- Audio noise reduction. Turn it on in the audio panel. The 2.9.0 noise reduction cleans keyboard clicks and room hum before the signal reaches your call app.
- Exposure lock. Tap the lock icon next to exposure so the image doesn't flicker when a window shade moves behind you.
- Stabilization toggle. Leave it off for a tripod-mounted phone. Enable it when the phone rests on a desk arm that picks up typing vibrations.
- LUT assignment. Browse the 18 built-in looks in the colour panel. Assign one to your main camera layer, not the scene master, so overlays stay neutral.
- New — Dual-format streaming and recording on macOS.
- New — Isolated recordings per source on macOS.
- New — Audio noise reduction on macOS.
- New — Control from AI agents on macOS.
- macOS 12.3 or later
- Apple Silicon or Intel Mac
Questions I get before install
Does Camo Studio work with Android phones and iPads?
Yes. It connects to iPhone, Android phones, and tablets for camera input.
Can I use custom colour grades in Camo Studio?
It supports custom LUT files and includes 18 built-in filters for quick grading.
Comments 0
Sign in to leave a comment.Sign inCreate an account
No comments yet. If a step is still there after you install it, say so.
More in Mac Apps
All in Mac Apps Updated
Caffeinated
Keeps your Mac awake, display bright, and screensaver off from the menu bar.
19 steps saved
 Updated
Camtasia
Records a screen and provides a timeline editor to trim, annotate, and narrate the result.
13 steps saved
 Canopy
Shows playback controls and a countdown timer in a small overlay at the top of the screen.
13 steps saved
 CapCut
Cuts short social videos fast with templates, auto captions and effects.
17 steps saved
 Updated
Capture One
Gives tethered shooters direct raw-file control over colour and detail before retouching.
20 steps saved
 BuhoLaunchpad
Replaces the standard app grid with a snappier, folder-friendly launcher.
6 steps saved
 BuhoCleaner
Removes leftover files from uninstalled apps and clears system clutter.
12 steps saved
 Carbon Copy Cloner
Creates a direct, bootable duplicate of a disk on a schedule you set.